Category: Mobile

  • VidMate Cash App – Watch Videos and Earn Money

    VidMate Cash App – Watch Videos and Earn Money

    Vidmate Cash is a new way of making some extra money by downloading and watching videos online. The App promises the payouts and real money to its users for using their platform. Today, In this article, we will talk about what exactly Vidmate Cash App is. and how you can use it to make money.

    Many online money-making sites and apps enable users to make money while using their platform. Websites like Fiverr and Upwork pay you for completing small gigs while platforms like Vidmate Cash and Sweatcoin pay you for using their app on your phone. These payouts are generally from the revenue that these websites generate while you are on the app.

    This article focuses on the legitimacy of the service and also guides to download the Vidmate Cash APK from their official site.

    What is Vidmate Cash?

    Vidmate Cash is an Android app that allows users to earn money by completing microtasks. The platform is a scaled-down version of the official Vidmate app which is a popular application to download videos from different platforms.

    Vidmate Cash features Video download, Movie download, and Apps Downloading. The tasks for earning cash can vary from downloading a video to completing a survey or downloading an app. Each task earns you a different amount and the platform is refreshed with new tasks every day.

    Vidmate Cash App APK Download

    Vidmate Cash app is not available officially on the Play Store and thus you have to download the APK version of the application from the official website. To make this process easy to understand, we have written a step-by-step guide for you to follow and download the Vidmate APK.

    Before proceeding, Ensure you have the latest version of Android installed on your device and the updated mobile OS.

    Step 1: Open any web browser such as Chrome or Firefox on your Mobile Device.

    Step 2: Enter the URL https://www.vidmatecash.com/ In the URL bar.

    vidmate cash official app website

    Step 3: On the Homepage of the Vidmatecash app, you will see the “Install” button at the bottom of your screen.

    install vidmate cash app

    Step 4: Click the install button and wait until the downloading is finished.

    Step 5: Now open the app and click “Install” when prompted.

    If Android asks for the “Scan app”, please use the Scan feature to scan the app for security before proceeding.

    Finally, Proceed further and install the application on your device.

    How to Register on Vidmate Cash?

    Once you have successfully downloaded the app, the next step is to create an account if you don’t already have one. Here are the steps to create your account on the Vidmate Cash App.

    • Open the Vidmate Cash App on your Android device.
    • Head over to the Create account option.
    • Enter your details such as Name, Email, and Phone number.
    • Verify your Phone number and Email Address by providing OTP and Clicking on the Verification link.

    vidmate cash app register login

    That’s it! Now open the app again and you are ready to earn money by watching videos on Vidmate Cash.

    Making money with Vidmate Cash App

    Now that we have downloaded and registered on the Vidmate cash app successfully, The next thing is to start earning money from the app.

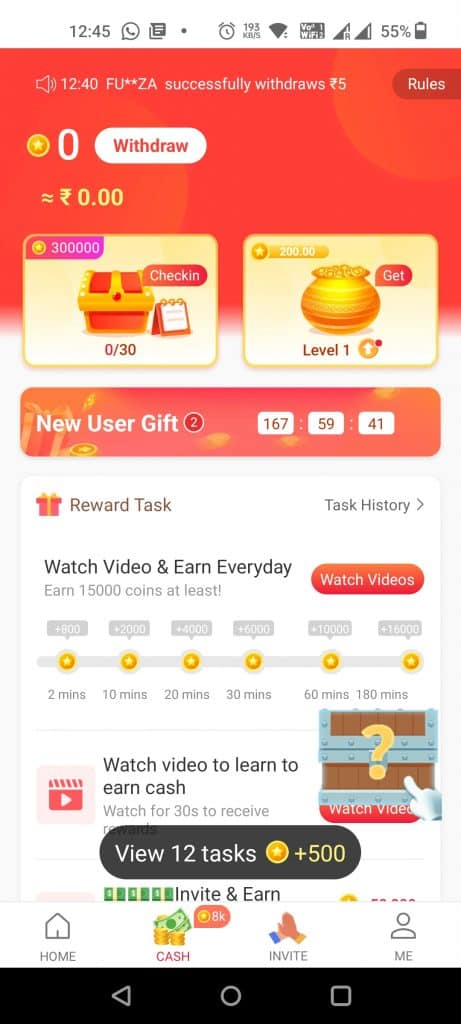
    As said earlier, You can earn money by watching and downloading the videos from the app. You can download WhatsApp videos, Facebook, TikTok videos, and Instagram stories. For downloading the videos, you will earn Vidmate credits. These credits can then be redeemed for real cash. The App says that 10,000 Vidmate coins are equal to 1 INR.

    The Vidmate Cash app website does not clearly say how exactly you can earn this money or how much they are paying for each view, but the website has a clear text saying you can make up to 500 INR per day.

    vidmate cash app money

    How to Withdraw Vidmate Cash?

    The minimum withdrawal amount is 500 INR or 5 million Vidmate coins. Once you reach this threshold, you can withdraw the amount from the Vidmate Cash app to your bank. Before withdrawing, you must convert the Coins into cash and then submit the request.

    Here are the steps to Convert Vidmate coins to cash.

    • Open the Vidmate Cash app on your Android device.
    • Click on the menu from the top-left corner and select the “Earn Cash” option.
    • Click on Withdraw and complete the KYC.
    • Select the “Select amount of coins” button and enter the amount of coins you want to convert.

    Now that your Vidmate coins are converted into Cash, Let’s see how you can withdraw it into your bank account.

    • On the Vidmate Cash App, Click the menu and select the “Earn Cash” Option.
    • Select the Withdraw to bank account option.
    • Enter your Bank details such as Account Number, Account Holders Name, and IFSC Code.
    • Finally, Enter the amount you want to withdraw and click the submit button.

    Vidmate Cash app does not support instant withdrawals and you will have to wait for at least 24 hours for your withdrawal to process.

    If after 24 hours, you do not see the money credited to your account then you can contact the Vidmate Cash Support team for the query.

    Frequently Asked Questions

    1. How to Get Vidmate Cash App Invite Code?

    Ans: Earlier, the Vidmate cash app was invite only but now you don’t need any invitation code for registering on the app. You can download and start using the app instantly.

    2. How to Download Original Vidmate Cash App?

    Ans: Due to its popularity, Many websites offer similar apps like the Vidmate Cash App. To download the original app, Visit the official URL of the Vidmate Cash app https://www.vidmatecash.com/ Download the App from the official URL only.

    3. Is Vidmate Cash App Safe to Download and Use?

    Ans: As per the official website, the Vidmate Cash app is Safe to download and use for earning money and it is scanned by Antivirus software for any malware or spyware.

    4. How to make money from Vidmate Cash App

    Ans: The primary way of making money from the Vidmate Cash App is to watch and download videos from the supported sites or watch movies on the app. You can also make money by referring your friends and other people. Vidmate offers 5 Rs. per successful Referral.

    Final Words

    Making money by just downloading videos is an easy way to make such extra bucks. The Vidmate Cash app makes it possible for users to make money while watching or downloading their favorite videos.

    However, please make sure that you download the original and real Vidmate Cash app from its official website and submit your details properly for easy withdrawals.

    If you have any questions or queries regarding the Vidmate Cash App or APK, please let us know by commenting below.

  • chrome://net-internals/#dns – How to Clear Your DNS Cache in Google Chrome

    chrome://net-internals/#dns – How to Clear Your DNS Cache in Google Chrome

    chrome://net-internals/#dns is a Google Chrome URL to Clear the DNS cache. The feature is not available in general settings and to edit the DNS cache you have to visit this URL. In this article, We will walk you step by step and guide you to clear your DNS cache in Google Chrome.

    Google Chrome is a popular web browser with over a billion users. Almost 80% of the internet is browsed using Google Chrome. Due to such heavy usage, every data is cached on Google Chrome to speed up the browsing. However, for some reason, if someone wants to Clear their DNS cache, it might get difficult as the process is a little complex. Thankfully, we have found an easy solution for you to clear your DNS cache on Google Chrome quickly.

    How to Clear DNS Cache?

    Clearing the DNS cache on Google Chrome is a lengthy process. To simplify this, we have broken down the whole process in a step-by-step guide with screenshots for easy understanding. Just follow the steps mentioned below and you will be able to Clear the DNS cache without any problem.

    Step 1: Visit chrome://net-internals/#dns

    On your PC or mobile, open Chrome browser and type in the following text in the URL bar “chrome://net-internals/#dns” (Without quotes).

    chrome net internals

    Step 2: Clear Host Cache

    Under DNS Lookup, search for “Host resolver cache” and click the button next to it that says “Clear Host Cache”.

    clear host cache

    Step 3: Restart Chrome

    Once you click the “Clear Host Cache” button, nothing will happen and no successfully executed type message will be displayed but in the background, the process is done and you have successfully flushed the DNS cache on Chrome.

    Now, close the Chrome browser completely and relaunch it.

    Step 4: visit chrome://net-internals/#sockets

    The next step is to visit chrome://net-internals/#sockets on your Chrome browser by visiting the link directly or clicking the “Sockets” option in net internals.

    net internals sockets

    Step 5: Flush Socket Pools

    under the Sockets tab, click the “Flush Socket Pools” button, and restart your Chrome browser.

    flush socket pools

    Now you have successfully flushed all the DNS cache on your browser and you can freely visit any website without getting DNS error or any other error.

    What is DNS Cache

    As of now, we know how to solve DNS-related errors by flushing the DNS cache but what exactly is the DNS cache? A DNS cache is a record of the IP address of the website you are visiting. Every domain name has a unique server IP to access the files DNS or Domain name server is responsible for mapping these domains to the relevant IP address.

    These records are generally stored on your browser such as Chrome. Sometimes, the server IP changes or the website is moved to a new domain, in such conditions, the Locally cached DNS is not able to detect the IP and you might get various DNS-related issues.

    Why you should Flush out the DNS cache?

    Flushing out the DNS cache means you are removing the existing DNS records of the websites that you visited in the past. If your previously visited website is not opening due to bad DNS cache then flushing the Cache is the best option.

    After flushing the Cache, whenever you visit a website, the browser will ask for the IP and other details again and update it in the DNS records locally.

    What is chrome://net-internals/?

    chrome://net-internals provides the browser activities-related information and helps debug various Socket, DNS, Domain Security Policy, and proxy-related issues. Net internals are very useful for troubleshooting issues like DNS problems, clearing bad proxies, reapplying proxy settings, flushing socket Pools, and Removing a domain from the Security Policy.

    The net internals network viewer has been moved to another URL chrome://net-export. You can visit this URL to start logging into the disk.

    How to Clear DNS Cache on Chrome Mobile App

    Android

    Step 1: To Clear DNS Cache on the Chrome Android app open the app on your mobile and visit this URL – chrome://net-internals

    Step 2: Now click the DNS option from the left-side menu and click the “Clear host Cache” button.

    net-internals dns mobile

    Step 3: Visit the Sockets option from the same left-side menu and click the “Flush socket pools” button

    net internals flush socket pools.

    Step 4: Restart your Chrome browser by clearing it from the Recent Apps section and opening it again. This will reflect the changes you just made and all DNS cache data will be removed from the Chrome Android app.

    iOS

    The Chrome app doesn’t have a direct option to clear the DNS Cache from the browser. Instead, we will follow a different method to flush the DNS cache using iOS settings.

    Note: This will flush the DNS cache for all browsers.

    Step 1: On your iOS device, click the Settings app and choose General Settings.

    Step 2: Select the Transfer or Reset Phone option from the menu and select “Reset” when asked.

    Step 3: On the following window, click Reset Network Settings and confirm that you want to reset network settings if prompted.

    Finally, Open the Chrome Browser and visit the website that was previously giving you the DNS error. If it doesn’t work please restart your iOS device to apply the changes we made.

    Final Words

    chrome://net-internals/#dns is a URL that helps you to visit Chrome net internals to debug Chrome activity and make necessary changes to DNS and others. In DNS, it allows you to flush the DNS Cache and reset it to solve any DNS error on Google Chrome.

    Please let us know if you have any questions regarding chrome net internals or DNS cache by commenting below.

  • Is Straight Talk Down? Straight Talk Outage fix

    Is Straight Talk Down? Straight Talk Outage fix

    Recently, A lot of Straight Talk users reported Straight Talk down or outage issues on their Android and iPhone. This issue is not new with network providers across the World. The Straight Talk network has lately been facing outage issues in many of the regions in the USA. Most of the time, when changing the area or driving to a different place might solve the outage issue quickly. However, if you have been experiencing this issue for a longer time then this article is definitely for you.

    Straight Talk is a popular mobile Prepaid service run and managed by Verizon Networks. The company started with the goal of solving network outages and service unavailable problems by connecting you to multiple networks in case of network failure. The service is really popular in countries like the USA. Unfortunately, after the Verizon acquisition, the Straight Talk network has been facing a lot of issues like Straight Talk down for many users. This issue can be easily solved by performing a few troubleshooting methods that we have covered in this article.

    Why is Straight Talk Service Down?

    Before proceeding to the solutions, it is important to understand if the service is down fully or if is it just a poor network connection. Also, observe if the internet is not working or if you are also unable to make the calls. Once you have identified the issue, it is easy to apply the recommended solution to fix the Straight Talk internet not working or service down the issue.

    There could be multiple reasons for your Straight Talk service to stop working. if the towers in your area are getting updates, or you might be traveling to some place where the straight talk network is poor or not working properly. You could also face the Straight talk down issue due to changes in your mobile network settings. Whatever the reason might be, the solutions we give in this article will help you to resolve them.

    How to Fix Straight talk down/Outage Issue?

    Before proceeding forward with the solutions, if the Straight Talk outage issue is common for everyone in your area, it is likely that the issue will get resolved on its own within a few minutes or hours depending upon the response time from the company. You can also check if the issue is temporary by visiting the Straight Talk network changes page and following the instructions mentioned on the page. Errors like not registered on Network are common for Straight Talk users and they can be resolved by changing your network settings.

    If you are experiencing a straight talk down the problem for quite some time or do not know if the issue is universal or is it just for you then follow these methods to fix it.

    1. Check Straight Talk social accounts

    If you are confused about whether the issue is common for other people too or is it just you then you can go to Twitter and search for the #straighttalkdown hashtag to confirm if a similar problem is reported by other people too. Similarly, you can visit their official Twitter and Facebook page to check for Straight Talk outage reports in your area.

    There are many websites that report real-time Straight talk servers down or outage issues by collecting the data from other people. You can find these websites by using a simple Google search and typing in “Straight talk down” in the search box. These websites also offer a Straight Talk outage map to confirm if the other people in your area are reporting a similar problem.

    straight talk outage map

    2. Restart your Mobile Device

    Many times, a simple mobile restart might solve this issue for you. due to some technical or software glitch, the network card on your mobile can get frozen and prevent your network from connecting to the towers. This might eventually cause your network connection to fail and you won’t be able to make calls or even browse the internet.

    To fix this issue, switch off your Android or iPhone for 30-60 seconds and turn it back on to see if the problem is resolved or not.

    3. Update your Straight Talk Towers

    If you are experiencing a low network connection, couldn’t make calls, or not being able to browse the internet then you might want to update your towers for Straight Talk. This will ensure that you are connected to the correct network in your specific area and your device is receiving enough cellular signals to make calls or browse the internet.

    To update your Towers for Straight Talk, You can change your APN Settings, Change carrier settings, or update your roaming list. We have also written a details article about how to update my towers for Straight Talk. You can view this article to know all the methods and steps to get your Straight Talk network back again.

    4. Contact Straight Talk Customer Support

    If all of the above methods fail to resolve your issue, and you are still experiencing Straight Talk down or Outage problems then you might want to get connected to the Straight Talk support team and ask them for further assistance. You can contact Straight Talk by directly visiting the Straight Talk support page or by emailing them.

    If you have a slightly better network area where you can at least make a call then you can contact them directly by calling on 1-877-430-2355 or dialing 611611 from your device and telling them about the Straight Talk outage issue you are facing.

    Straight talk customer support

    Conclusion

    Straight Talk is an old and very popular Cellular network company. The company already has a very strong presence across different states in the USA. However, you might feel a Straight Talk down issue every once in a while and it can prevent you from performing various actions that would otherwise be easy to perform.

    You can try the different methods that we have given in the article to fix the Straight talk Down problem on your device and see if you get your network coverage back again.

  • Cool Roblox Avatar Ideas You Must Try

    Cool Roblox Avatar Ideas You Must Try

    Customizing your Roblox Avatar with cool and unique outfits is the only way to stand out from the rest of the players and create your unique identity. Roblox gives you the freedom of designing your character the way you want that too for free. having Cool Avatars for Roblox Characters is the best way to make yourself appear differently throughout the different games that are available on the platform. In this article, We will share some cool and best Roblox Avatar outfit ideas that can help you to be unique from other Roblox Players.

    Roblox is a popular gaming website with hundreds of games to choose from. The platform is quite unique and offers a complete set of tools to build your own game, build your own character, or even create your own custom accessories such as Hats, T-shirts, Shirts, Shoes, Hair, and dozens of others. You can either create these items on your own or get a Roblox promo code and redeem it into your account to avail of these accessories for free.

    Roblox accessories library itself has thousands of free and paid items that you can get and add a unique look to your own Roblox Avatar that represents you in the game. this article will help you to understand some of the best Roblox Avatars that you can get.

    Best Cool Roblox Avatar outfits that you can try

    As said earlier, Roblox library already has thousands of options and accessories to customize your own Avatar in a unique way. Similarly, you can also buy different already-built Avatars from this library. You can either get these items for free or by using the in-game currency or Roblox called Robux.

    Robux can be directly purchased from the website or you can receive Robux from friends and other players. Here is a list of some of the most popular and cool Roblox Avatars for your next character.

    1. Orange Pirate

    cool roblox outfit

    This has to be one of the coolest Roblox Avatars in 2023. This modern-looking Avatar is definitely going to make you stand out from all other players in every Roblox Game. Below are the requirements to obtain this look in Roblox.

    Requirements to obtain Orange Cool guy looks

    • PITCH BLACK CHAIN PANTS (5)
    • BLACK EYEPATCH (30)
    • ONYX ONI HORNS (100)
    • NERD GLASSES (30)
    • BLACK FUNNY PACK (20)
    • BEAUTIFUL ORANGE HAIR FOR BEAUTIFUL PEOPLE (95)
    • TENTACION – PRAY TO YOUR FATHER (5)
    • SONIC ISOLATORS (FREE)

    Total Robux Cost – 285 Robux

    Also Read: How to Download Twitch VOD Videos

    2. Cool Samurai Outfit

    cool samurai outfit

    If you are a fan of Japanese culture and outfits then this character outfit idea is definitely for you. This is a simple yet attractive outfit that is inspired by the Japanese Samurai culture and their dress code. This outfit comes along with a cool Japanese Samurai hat and a cool-looking messy hairstyle that is also available in the Roblox Library.

    This outfit items requirement:

    • Devil Straw Samurai Hat (90)
    • Samurai Red ONI Uniform + (5)
    • Black Messy Hairstyle (85)
    • Skin Color Head w/ Horns (100)
    • Black Fluffy Messy Boy Hair (75)

    Total Robux Cost – 390 Robux

    3. Oakley

    Oakley cool outfit

    Looking for a cool Roblox Avatar Outfit for free? well, Okaley is a perfect character outfit for you. This is one of the simple yet cool-looking outfits available on the Roblox Marketplace. The Avatar is created by the Roblox team and it is one of the few free Roblox Avatars that you can start using immediately.

    Free Roblox Outfits

    If you don’t have any Robux to spend or don’t want to invest in outfits that cost hundreds of Robux then these next outfit ideas are for you. These are the free Roblox Outfits that you can obtain without spending any money on buying Robux.

    4. Cool Free Roblox Outfit

    free roblox outfit

    This is a free Roblox Avatar that can be created using the Freely available accessories in the Roblox Library. Below is a list of required items to obtain this look for your Roblox Character.

    This outfit items requirement:

    • Fruity Pebbles Sunglasses (NFS)
    • Steel Rabbit Ears (NFS)
    • White Flamingo Fedora (NFS)
    • Denim Jacket with White Hoodie (FREE)
    • Blonde Spiked Hair (FREE)
    • Dark Green Jeans (FREE)

    Total Robux Cost – 0 Robux (Free items)

    5. Cool Guy Outfit

    roblox simple guy outfit

    Required items to obtain cool guy looks

    • Denim jacket with a white hoodie
    • dark green jeans
    • Roblox ‘R’ baseball cap

    Total Robux Cost – 0 Robux (Free items)

    6. John Roblox Outfit

    john roblox outfit

    John is a Roblox character with free outfit accessories that is available on the Roblox Marketplace. This character outfit comes with a total of 11 accessories including jackets, hair, face style, shoes, and many more. Below is a list of items that can be obtained along with the character.

    Items included with John’s Roblox Outfit

    • John Shirt
    • John Pants
    • Hairs
    • Scarf
    • XBOX_M Left Arm
    • XBOX_M Right Arm
    • XBOX_M Left Leg
    • XBOX_M Right Leg
    • John’s Smile

    Total Robux Cost – 0 Robux (Free to obtain)

    Click here to Get John’s Roblox Outfit for free

    Funny Roblox outfits

    7. Butterfly Goat Outfit

    funny Roblox outfit

    When it comes to funny Roblox outfits, there are many different outfit combinations that you can try and make your character look funnier. The best this about designing a funny Roblox character is that you don’t have to be a creative person, nor do you have to keep making the outfit colors or different outfit aspects.

    The butterfly Goat outfit is one of the outfits that can be obtained easily and you can definitely make it more fun by adding different accessories to it.

    Required items to obtain Butterfly Goat looks

    • UNIVERSAL GOAT UNIFORM) (NES)
    • KNOW. IT ALL GRIN) (25)
    • SHUTTER FLUYERS)(NFS)
    • HASHTAG NO FIETERNNES
    • DREAMY BLACK HAIR (100)
    • HOLIDAY LIGHTS) (50)
    • HIGHLIGHTS HOOD (NES)
    • HYPER HOVERHEART (NES)
    • TIC ATLL Tea

    Total Robux Cost – 175 Robux

    8. Captain Squid

    captain squid funny roblox character

    Captain squid is one such funny Roblox Character that will help you to grab the attention of other players in almost all Roblox Games. This is such a unique Character with a great color combination and very detailed accessories. There are a total of 7 items in the Captain squid bundle that comes along when you purchase it.

    Items included with Captain Squid Roblox Outfit

    • Captain Squid Left Arm
    • Captain Squid Right Arm
    • Captain Squid Left Leg along with shoes
    • Captain Squid Right Leg along with shoes
    • Captain Squid Torso
    • Captain Squid’s Head

    Total Robux Cost – 650 Robux

    Try Captain Squid Roblox Avatar

    9. Mr. Skeleton

    skeleton roblox outfit


    Items included with Captain Squid Roblox Outfit

    • Left Arm
    • Right Arm
    • Left Leg
    • Right Leg
    • torso
    • Head

    Rich Roblox Avatars

    10. Rich Guy outfit

    rich roblox outfit

    This is the Rick guy look that is way more expensive than any other outfit idea on Roblox. Each item in this look costs more than many complete outfits on Roblox. The total cost of this outfit is around 70000 Robux. If you want to flex your Money on Roblox then You should definitely try this Roblox Avatar idea.

    Items included with Captain Squid Roblox Outfit

    • Quality White Headphones
    • Vintage Glasses
    • Black Ripped (Jeans)
    • Black Sweater E Fannel w  lockchain
    • Perfect Legitimate Business Hat
    • Beautiful Hair for Beautiful People
    • Playful Vampire

    Total Robux Cost – 68990 Robux

    Also Read: https://aka.ms/remoteconnect 

    11. Most Expensive Roblox Outfit

    most expensive roblox outfit

    Items included with Captain Squid Roblox Outfit

    • Void War Hammer (100)
    • Black Wallet Chain (1.0) (70)
    • Medical Mask (Black) (40)
    • Silver Link Chain (75)
    • Silver Victorian Earrings (55)
    • letter H necklace (2)
    • Violet Valkyrie (50000)
    • Purple Варе Fur Coat K Gucci Shirt (5)
    • Korblox Deathspeaker Right Leg (NFS)
    • Rainway’s Black Iron Suit Bottoms (5)
    • 8-Bit Dark Horns of Pwnage (11099)
    • Beautiful Hair for Beautiful Space People (5933)
    • Purple Starface (23999)

    Total Robux Cost – 91393 Robux

    12. Korblox Deathspeaker

    Korblox Deathspeaker

    Korblox Deathspeaker is the most expensive Roblox character that is available in the Roblox Library. This is definitely a badass character with unique looks and outfits. if you are looking for the most expensive character then you should definitely give it a try.

    Click here to obtain the Korblox Deathspeaker on Roblox

    Cheap Roblox Avatar

    13. Cheap Roblox Avatar Outfit

    cheap roblox outfit

    For people looking for a Cheap Roblox Avatar Outfit, this outfit is definitely a must-try for them. This outfit comes under just 50 Robux and can help you to give those rich Avatar looks for spending just a few Robux. This cheap-looking outfit comes with a Cool hairstyle, Face Mask, Golden Headphones, Messy blue hair, and a black outfit that will give you those rich looks for a cheap price.

    Items needed to obtain this outfit look

    • Golden Headphones-KSI (FREE)
    • Roblox Baseball Cap (FREE)
    • Changing Stare Mask (20)
    • True Blue Hair (FREE)
    • Y2k Emo Goth Vamp Chain (5)
    • Oakley’s Face (NFS)
    • Black Shirt Emo (5)

    Total Robux Cost – 30 Robux

    Conclusion:

    These are some of the Roblox Avatar ideas that can help you to get a unique look in any Roblox game using different Outfit styles. There are many more combinations you can try to get a cool Roblox outfit. You can also go for free Roblox outfit ideas if you don’t have any Robux to spend on expensive accessories. Just make sure to obtain all the free items that are available in the Roblox library and then try different combinations of these accessories to create your own unique outfit.

    Please let us know if you need more cool Roblox Avatar outfit ideas and we will share some more Avatar styles with you.

  • How to Access Archived Emails in Gmail

    How to Access Archived Emails in Gmail

    Archiving emails in Gmail is a great way to keep your important or unimportant emails away from your main inbox. It also helps you to access them whenever you need them. However, many people find it difficult to access archived emails in Gmail. This can be problematic for many people as they might not be able to spot the location of the archived emails when needed. There is no separate folder for archived emails in the Gmail Mobile app or on the desktop and it might confuse a lot of users.

    Gmail is considered a synonym for emails. Almost everyone who uses a mobile phone or laptop has a Gmail account. Gmail helps you send and receive emails constantly. Gmail helps you to send and receive important emails, Attachments, Documents, and other data on your Mobile or PC. To access other products of Google such as Youtube or Share files on Google Drive, a Gmail Id is a must thing. It is a handy and very useful tool for College students and Office workers to share important documents, Notes, and Presentations or just to have their official work on the record. Whatever the reason might be, Gmail has always been a useful tool. However, there are a lot of Gmail features that are confusing or hard to understand and one such feature is archiving emails in Gmail.

    This article will guide you through different steps to successfully retrieve your archived emails in Gmail Android and iOS app and on their desktop site.

    What happens when I archive emails in Gmail

    When you archive an email in Gmail App or the desktop site, the emails are directly sent to the “All mail” folder. This folder shows you a collection of all the emails that you receive at your email address. This includes mails from the spam folder, Inbox, Archived mails, Promotional, and updates.

    For accessing your Archived mail, You can directly visit the “All mails” folder from the Gmail website or the mobile app and enter the sender’s name or email address in the search box to quickly locate it.

    How to Archive Emails in Gmail

    We keep using our Gmail mailing address on a lot of websites and these websites keep sending us promotional emails and offer daily. To keep your important emails away from these offers and to protect them from getting deleted mistakenly, archiving the emails is one of the best options.

    To Archive Emails on Gmail, Follow these steps

    • Go to the Gmail App or Website and log in with your ID.
    • Select the email that you want to archive, if you want to archive multiple emails then select them by clicking the check box.
    • Click on the Archive icon that looks like a down arrow.

    archive emails in gmail

    That’s it! it’s that simple to archive emails in Gmail. Now let’s see the steps to access these archived emails in Gmail.

    How to Find Archived email on Gmails Web

    It is really easy to access or find the archived emails on your Gmail account. Unfortunately, many users find it tricky or difficult to find the exact location as there is no separate folder for archived emails. Generally, all the archived emails are stored under the “All Mail” label, but you might find it difficult to point out or locate the exact archived email. Here are the steps to find archived emails on Gmail Website.

    Step 1: Go to Gmail.com and log in with your credentials. On the main dashboard, Scroll through the options using the left-side menu to find the “All Mail” option. (Click the “More” button if you can’t locate All Mail directly.)

    all mail gmail

    Step 2: In the All Mail option, you will find all your emails, including Primary, Promotional, Updates, All Trash mail, and Archived mail.

    Step 3: Now scroll through the list and find the email that you have archived. You can find the email by using the sender’s mail ID, Subject title, Mail body, date, size, attachment, etc. If you can’t remember any of those then the trick is to locate emails that do not have “Inbox” labeled before the subject. These emails without Inbox labels are generally Archived emails on Gmail.

    access archived mails on gmail

    How to Access Archived Emails on Gmail Mobile App

    If you use Gmail App on your Android or iOS then it is quite easy to locate Archived mail on these devices. Also, you will be able to archive or unarchive emails on Gmail mobile app quite easily. Here are the steps.

    Step 1: Launch the Gmail app on your Android or iOS device.

    Step 2: Click the three-line icon on the left side of the screen and select the “All Mail” option.

    Step 3: Finally, Look for the archived mail in the “All Mail” label. You can use the search box to enter the sender’s name or email address to quickly find the archived email you are looking for.

    Conclusion:

    Finding archived emails on Gmail is quite easy but also difficult at the same time. Gmail should introduce a separate folder or label for Archived emails just like it does for Spam, Promotional, or other types of mail. Having an option like archiving emails when you receive thousands of spam and promotional mails is a great way to keep your important emails secure and away from your main inbox. Whenever you receive the reply to the archived mail, you will directly get it into the Inbox folder.

  • How To Find Someone’s Address from Phone Number

    How To Find Someone’s Address from Phone Number

    Did you ever feel a need to find someone’s address? but all you have is their phone number, Now it might seem impossible to get someone’s address with just a phone number. Thankfully, there are a few ways that might help you to actually achieve this. Not many people are aware of these methods and even for us it took a bit of time to find all the working methods that might actually help you. In this article, we will discuss about these methods and how you can easily track someone’s address or other details with just a phone number.

    Find Someone’s Address from the Phone Number for Free

    It might seem a difficult task to track someone’s address with just a phone number. However, there are many websites that work as a directory and can offer you the address when you input the person’s phone number. There are other ways also such as searching on Google Maps or Social Media. These methods might be lengthy and take your time but there is a high chance that these methods can work as effectively as the directory websites.

    There are some websites known as reverse phone lookup, They work similarly to a phone directory but in reverse. Rather than searching for a person using their name, you put in their phone number and these websites will give you the complete details of the person that phone number belongs to.

    Find Address From Phone Number in USA

    In the USA, these websites are quite popular and they have been working for years now. Their database is strong and frequently updated with the new list of phone numbers. If the person you are trying to track is from the USA then this method can come in handy and you might easily find the phone number without much hassle. Let’s see the steps to find the address by using Mobile Number.

    Track address from Phone Number Using Whitepages for free

    If you are from the USA then white pages is a well-known website for you to track people using their first and last names. However, very few people are aware that Whitepages also offers you a reverse phone number and reverse address lookup option to search for a person by using just their phone number. Here are the steps.

    Step 1: Visit the Whitepages website and click the “Reverse Phone” link just above the search bar.

    find address white pages

    Step 2: Enter the phone number with the area code in the given search box and click the search button. (Verify captcha if required)

    Step 3: Once the search is complete, you can see the phone number and the address associated with it.

    reverse phone lookup whitepages

    The website also gives you the first and last name of the person who owns that phone number and other details such as the person’s age, city, other phone numbers, relatives & associates Background reports, etc.

    Find the address from a mobile number using BeenVerified

    BeenVerified is another popular website with a strong database of phone numbers and addresses associated with it. You can use this website to find People, Phone lookup, Address lookup, Email Lookup, or to find any vehicle information.

    1: Visit BeenVerified and click on the Phone lookup link.

    phone lookup beenverified

    2: Enter the Phone number or the landline number that you want to track.

    3: Wait for the search process to complete. The website will give you all the available details such as Address, Person’s name, Mobile Phone Carrier, Background info, Social Media accounts, Online Photo Search, current address, past address, and other information related to that phone number.

    Use Free lookup

    freelookup.net is a free website to find someone’s address using the phone number. This website is an ideal choice to look for someone’s address using their phone number in the UK, Canada, USA, Australia, New Zealand, and Europe.

    The website offers you information such as Owner’s name, residential address, location, carrier, Line type, social media profiles, and other phone numbers associated with that owner, photos, and email address.

    Here are the steps to track the address on free-lookup.net

    • Visit the official website of free-lookup.net
    • Enter the Phone number in the search bar and wait for the website to complete the search process.
    • Get information such as name, Address, Spam score, Spam report, phone number searches, and other data associated with that phone number.

    find address using phone number on free lookup

    Find the address using the Phone number on TrueCaller in India

    Truecaller is a popular android and iOS app to get the details of any phone number. The app is quite popular in India and in Europe. It is completely free to look for addresses using a phone number on Truecaller and you can do it by going directly to their website or by downloading their android or iOS app on your phone.

    Step 1: Here are the steps to find someone’s details using their phone number on truecaller.

    Step 2: Visit the official website of Truecaller or download their mobile app.

    Step 3: Enter the phone number that you want to track and log in with your Google or Mircosoft account.

    find address using phone number truecaller

    That’s it! Once you have successfully logged in, the website will redirect you to the page where you will find all the necessary information including the person’s name, Email address, Mobile number’s carrier, address, and activity report.

    track phone number email address

    The information displayed on Truecaller can be trusted because of its strong database and considering that millions of users use it daily.

    FAQs

    Q. How to Find Someone’s address using a Phone number in USA & Canada?

    Ans: You can use websites like whitepages.com, anywho, or allareacodes.com to reverse lookup for a phone number and get details of the person associated with that number.

    Q. How to Find someone’s address using a Phone number in the UK?

    Ans: There are many reverse address lookup websites such as https://who-called.co.uk/ or use free-lookup.net’s UK database to find the address of the person by just using their Mobile or landline number.

    Q. Find the address of a person using their phone number in Europe

    Ans: If you want someone’s address in Europe by just using their phone number then you can simply use free-lookup.net and enter that person’s phone number to get all the details associated with that number.

    Final Words:

    If someone is harassing you or constantly calling you for no reason then you can use the methods given in this article to find their name and address to confront them directly. These methods are proven and work for almost everyone who wants to track the addresses of people by just using their phone numbers.

    Please let us know if you need more information or if you know any other trick to find someone’s address by using their phone number.

  • How Do I Update My Towers for Straight Talk

    How Do I Update My Towers for Straight Talk

    Having a slow internet speed or not getting proper network coverage even to make a call is a nightmare in today’s world. not getting connected to your network provider or receiving errors like not registered on the network can simply mean that you are being blocked from your making or receiving a call or even using the internet, There are multiple factors that might contribute to a poor network connection that can lead to all of these. People using services like Verizon and Straight Talk often face these issues whenever they go out of their preferred network zone. However, Upgrading your Towers for Straight talk might be the solution here. This will ensure that your network connection is strong enough to support your internet requirements or even at least to make a call in low connectivity areas.

    Straight talk is a mobile prepaid service that works on a pay-as-you-go model. The company was recently acquired by Verizon networks and is operating in almost every state in the USA. The straight talk uses network services from multiple companies including, AT&T, T-mobile, and Verizon, at any given time, you would be connected to any of these three service providers.

    The company claims to offer uninterrupted service throughout the United States of America. However, we all know that this isn’t the case, and every now and then you might face network or coverage issues while using the Straight Talk device. Thankfully, by doing research, visiting various forums, and talking to experts, our team has come up with a list of solutions that might help you to solve this coverage issue on Straight talk by updating the towers, changing the APN, changing carrier settings, and doing few other settings to resolve the issue.

    Update My Towers for Straight Talk

    Let’s talk about the possible troubleshooting methods and methods that might actually help you to get a strong network and better signals on the Straight Talk device. These methods are easy and you can easily use them to resolve the network by updating your towers on Straight talk.

    Update Access Point Names (APN)

    Updating your Access point names is the first method and an important step towards solving the network coverage issue faced on Straight talk devices. Straight talk does not own any mobile network towers, rather, it rents them from multiple providers such as AT&T, and Verizon. This is bad as well as good news, as you can switch between networks to see which network provider has the strongest network in that area. Here are the steps to change the APN setting on your device.

    Configure Straight talk on AT&T Network

    Let’s first see the method you can use to change your current network provide on Straight talk to the AT&T network.

    Step 1: Launch the Settings app on your device and head over to the Mobile Network option under Networks & Connectivity.

    Step 2: Select Mobile Networks and scroll through the list to find the Access point Names text and click it.

    APN update straight talk

    Step 3: Here, Click the Three dots icon or the “+” Icon given at the top right corner of your screen to add a New APN.

    straight talk roaming update

    Step 4: Finally, enter the below-given data in the respective fields in the New APN option.

    • Name: Leave blank
    • APN: att.mvno
    • Username: Leave Blank
    • Password: Leave Blank
    • MMSC: mmsc.cingular.com
    • MMS proxy: 66.209.11.33:80
    • Max Size: Leave blank
    • MMS UA Prof URL: http://www.apple.com/mms/uaprof.rdf

    update towers straight talk

    Leave all other fields as blank and click the tick mark icon on the top-right corner of your screen to save the settings.

    Configure network on Tracfone

    As we have already seen the method to configure your network on AT&T towers. Let’s see how you can update it on the Tracfone network.

    Before moving forward, follow steps 1 to 4 given in the previous method until you reach the “Add New APN” option, and then just enter the data given below. If you haven’t read those then we are repeating them here as well.

    • Go to the settings option on your mobile.
    • Head over to the Networks >> Mobile network option
    • Under mobile networks, click the Access Point Names or APN.
    • Click the Plus sign or Add new APN option depending upon your device.

    Once you are on the Add new APN page, enter the following data in their respective fields.

    • Name: Leave blank
    • APN: tfdata
    • Username: Leave Blank
    • Password: Leave Blank
    • MMSC: mms-tf.net
    • MMS proxy: mms3.tracfone.com:80
    • Max Size: Leave blank
    • MMS UA Prof URL: apple.com/mms/uaprof.rdf

    Leave all other fields blank and click the save button on the top-right corner to save your APN.

    Update the Roaming list on your Mobile

    The Preferred Roaming list is a list of frequencies that are offered by third-party carrier services. In the case of Straight talk, if you are unable to connect to the default network then you can switch to some other network such as T-mobile or AT&T to get your network back. This method will help you to get quicker and faster internet speed along with good network coverage to make or receive calls on your device.

    You can update your Preferred roaming list by calling *22891 from your dial pad on your mobile. This will activate the PRL update request and you will receive the list of the latest PRL services that are available for you.

    Change Carrier Settings on your Mobile

    This is another important setting to do when you want to update your Straight Talk towers. by changing or updating the carrier settings you can improve the network speed and connect to the best available network in that area.

    Here are the steps to update the carrier settings on your Straight talk android phone.

    #1. Open the settings app on your phone by scrolling down the notification bar from the top and selecting settings. Alternatively, you can also open settings by launching the app from your app drawer.

    #2. Under network and connectivity, click on the Network settings option.

    #3. Click on the Sim card for which you want to update the carrier setting.

    #4. Click on the Operator option and uncheck the Auto-select option. Now you will get a list of preferred networks in your area, just select the best available network and you will be switched to that network automatically.

    Conclusion

    If you were looking for How Do I Update My Towers for Straight Talk? then these are the methods that we have given above that will help you to solve your network and connectivity issues. You can also try other methods that you might find on Youtube or other online forums.

    If you know any other solution apart from these three then please let us know and we will include it in our article.

  • Google Drive Still Processing the Video [Fixed]

    Google Drive Still Processing the Video [Fixed]

    If you use Google Drive to store photos, Videos, or other important files on the cloud then you must’ve come across the text that says “We’re processing this video. Please check back later.” or something like “Video is still processing and can be downloaded later” This is a common problem with many Google drive users and because of this, they are unable to download or view the video file as it is still in process. In this article, we will discuss the reasons for this text to appear and how you can bypass this and video or download the video without any interruption.

    Google Drive is a widely used cloud application to store and share files. It is also one of the important products of Google as it enables google to offer multiple services such as Google Docs, sheets, and Google Slides under the same platform. Google Drive also helps you to save space on your mobile or PC by transferring files to the cloud. Google Drive offers up to 15 GB of storage for free which is enough for many people.

    A lot of the drive users use it for sharing files and other documents, Videos with their friends and family. However, when you or someone tries to download the video they say a text saying the following lines.

    • We’re processing this video, Check back later or download the video now. 
    • We’re processing this video. Please check back later.
    • The video is still processing and can be downloaded later.

    These are some of the common errors that a user sees when playing a video online on google drive. read this article to understand what google means by processing the video, how long it takes, and how you can easily view the video on Google Drive without any interruption.

    What does Google Drive Processing Video mean?

    When you upload a video on Google Drive, It goes into the upload phase until the uploading is done. after that, the video is processed to support different resolutions, Formats, devices, and codecs. During this process you see the “Google Drive Processing video” message appearing on your device.

    How Long does Video Processing take on Google Drive?

    There is no solid statement about how much time Google Drive or Photos takes to Process a video as it needs to be uploaded first and then the video will be processed. Obviously, the major factor while uploading a video would be the size of that video which will influence the time taken to upload that video. However, uploading a video from PC and mobile works differently. Your internet connectivity such as LAN, Wifi, 3G, 4G, and 5G upload speed also influences the uploading time.

    How long does it take to process the video on Google Drive? well, it can take anywhere between 10-30 minutes depending on the video to process the video. Once the Processing of the video is completed, you can video or download the video without any problem.

    Also Read : 

    How To Fix “Google Drive Video Still Processing”

    If you have successfully uploaded a video file on Google Drive and still whenever you click on it then it prompts “Video Still Processing” then you should wait for some more time for the video to complete its processing in the background. However, if the issue does not get resolved on its own then you can follow a few methods mentioned in this article that will help you to get rid of the Video File still processing issue on Google Drive.

    Reupload the video

    If the video is short and even though after uploading the video a long back if you are still seeing the “We’re processing this video, Check back later or download the video now” message appear on the screen when you click it, there are chances that the file is not properly uploaded or processed by the Google Drive.

    If the video length is not that big and your upload speed is good then you can try to upload it again and see if the processing gets completed for you to play the video directly on Google Drive.

    Clear Browsing Data and Cached files

    if the video is uploaded and the processing of the video also gets completed. However, if you still get to see the “Processing video” message then there might be some problem with your browser. The most common problem in such cases is bad browsing data and cached files. These files are temporarily stored on your browser for faster access but sometimes these files can create problems that can lead to errors and bugs appearing while using the internet.

    Follow the below-given steps to clear your browser cache and data.

    Step 1: Open your browser and click the menu icon given at the top right corner of your screen and select the settings option.

    chrome settings option

    Step 2: Now on the settings menu, Select the “Privacy and Security” option from the left side menu and click on “Clear Browsing Data” under privacy and security.

    clear chrome browsing data and cache

    Step 3: Finally, Restart your browser and open google drive to play the video without the “Video Still Processing” issue.

    Upgrade Your Browser

    If for any reason, both the already mentioned methods fail to solve the “Video is Processing” error on your Google Drive then update your browser to the latest available version. Follow these steps to update/upgrade your browser.

    Step 1: If you have already launched the browser on your computer then simply click the menu icon on your browser and select the last option “Help >> About Chrome”

    upgrade google chrome

    Step 2: Now under about chrome, The browser will automatically check for updates and if there is an update available then it will automatically download it.

    chrome checking for updates

    Step 3: Once you see the “Chrome is up to date” message rather than checking for updates, that means the upgradation process is completed. Just relaunch your browser and go to Google Drive to see if the issue is resolved.

    chrome is up to date

    Download the video and play it offline

    If the problem is still not solved then you can try downloading the video by using the shareable link on Google Drive. This way you can not watch the video directly on Google Drive and it will consume some of your data and space on your device.

    Here are the steps to download the video using a link.

    #1 Open the Google Drive App or Website on your browser.

    #2 Head over to the video file that you want to download.

    #3 Now Right-click on the file and select the “Get Link” option.

    get shareable link google drive

    #4 On the following window, Select “anyone with the link” under the General Access option and click the “Copy link” button.

    #5 Open the link in the new tab and click the download icon to start downloading the video file.

    #6 Finally Open it on any local video player such as VLC Media Player or MX Player and enjoy your video.

    Conclusion :

    Google Drive is an important part of our lives and it makes sharing large files, sheets, docs, pdfs, and videos so much easy. However, Due to the nature of videos, some users might experience issues like the video keeps loading and never actually plays. If you face any such issue then make sure to try the methods given in the article.

  • How to Enable Google Drive Dark Mode on PC, Mobile and iPhone

    How to Enable Google Drive Dark Mode on PC, Mobile and iPhone

    It’s not a long time ago when many websites and apps started rolling out the dark mode version of their products. Surprisingly, almost everyone accepted the switch and people started liking the new dark version of these apps. Nowadays, a lot of websites and apps launch their product with a dark theme by default without wasting time on developing a lighter version. However, many applications and sites still prefer the light mode over the dark mode and one such platform is Google Drive. In this tutorial, we will explain how you can enable Google Drive dark mode on their Website, Android, and iOS app.

    Google Drive does not need any introduction. It is a cloud storage platform with over a billion users worldwide. The platform is used widely for storing and sharing files, videos, images, and other documents. It also enables you to use Google Docs, Sheets, and Slides for free. It comes with 15 Gigabytes of default storage space that can be upgraded by subscribing to its premium services. People upload and host videos on Google drive to share them with other people.

    Does Google Drive offer a Dark Mode?

    As people are still confused about whether Google Drive offers a dark mode or not and it’s a genuine concern as still there are many apps and websites that do not offer the darker version of their product. Google Drive however offers the dark mode option on Android and iOS but does not offer it on PC or on the website. Thankfully, there are a few workarounds that can help you to turn your Google drive on the Desktop version to the dark theme.

    In this article, we will discuss how you can turn on/off Google Drive dark mode on Windows, Android, and iOS.

    Turn On Google Drive Dark Mode on the Website

    Google Drive does not offer a direct way to turn on the Dark Mode on its website even after a lot of requests from its users. Enabling Dark mode on Google Drive can help you to use it at night time without hurting your eyes. Thankfully, there are a few browser extensions that can help you to turn the Google Drive light version to a darker one on your Desktop. this extension is free to use and you can enable Google Drive as well as any other website that you wish to change to a dark mode. Moreover, this extension will enable google drive dark more on Windows as well as Mac.

    Below is a guide to installing the extension and converting the light theme to a darker one on Google Drive.

    Step 1: Go to the Chrome extension store by visiting this link and type “Turn Off the Lights” in the search box and click on the first option that appears.

    turn off the lights chrome extension

    Step 2: Click on the “Add to Chrome” button placed on the right side and select “Add extension” when prompted.

    add turn off the lights to chrome

    Step 3: Once the extension is added to your browser, you will see a small bulb-like icon next to the URL bar

    turn off the lights

    Step 4: Right-click on the icon or if you are on a laptop then double-click the icon and select the “Options” tab from the drop-down menu.

    Step 5: On the following new tab window, Click the “Night Mode” option from the vertical menu on the left side and Scroll down a little. Here you will find two options

    1) Show the night switch button below the web page to make the page dark or light

    2) Activate the ‘Night Mode’ option when you click on the gray lamp button

    The second option will be enabled only when you enable the first one. Select the appropriate option and head over to Google drive by opening it in the new tab or if it’s already opened then refresh the tab to reflect the changes.

    turn off the lights options

    Step 6: Once you refresh the Google Drive page, you will see a night switch icon on the bottom-left corner of the screen. As shown in the image below.

    enable google drive dark mode

    Step 7: Finally, Click the Night icon and the light theme of Google drive will automatically be converted to a dark one. Similarly, If you want to exit the dark mode and view the lighter version of Google Drive then just click the night icon once more and the changes will be reverted.

    google drive dark mode enabled

    How to Enable Google Drive Dark mode on Android

    Android users are lucky as Google offers a built-in Dark mode option on the app. Most Android devices come with dark mode as their default Google Drive app theme. However, if you have light theme enabled and want to change it to a dark theme then also its a simple. Follow these steps.

    Step 1: Open the Google Drive app on your android device.

    Step 2: Click the Three lines icon on the top-left corner of the app.

    google drive menu

    Step 3: From the list, Select the “Settings” options

    google drive settings

    Step 4: Scroll down to the option that says “Choose theme” and click it.

    choose theme google drive

    Step 5: Finally, select the “Dark” option and you will see the default theme changed to dark.

    google drive dark mode android

    Enable Google Drive dark mode on iPhone

    Just like android, enabling the dark mode on iPhones or iPads is also easy and you can turn the dark mode on in just a few steps.

    Step 1: Open the Google Drive app on your iPhone or iPad.

    Step 2: Click the options menu by clicking the three horizontal lines on the top-left corner of the app.

    Step 3: Select the “Settings” option from the list.

    Step 4: Finally, Click the “Choose theme” option and select “Dark”.

    Also Read:

    How To Disable Google Drive Dark mode on Android and iPhone

    If the dark mode on your android or iOS device is already active and you wish to disable it or switch to a litter version of the application then follow these steps.

    1. Open the Google Drive app on your Android or iOS device.
    2. Open the Menu by clicking the three lines on the top-left corner.
    3. Select the “Settings” option from the menu.
    4. Scroll through the options and select the “Choose theme” option.
    5. Finally choose “Light” or “System Default” option when prompted.

    That’s it, Google Drive dark mode will be deactivated and you can use the app in a lighter version.

    Conclusion:

    Although Google does not officially support Google Drive dark mode there are other workarounds to use the platform in a darker mode using third-party extension such as “Turn Off the lights”. There are other extensions too, just do your research and use a suitable option for yourself.

    Android and iOS users are lucky as the Google Drive’s default theme on both the applications is Dark and they can even swtich between dark and light mode.

  • How to Fix “Not Registered on Network Error”

    How to Fix “Not Registered on Network Error”

    As over a billion people using the android operating system daily, people also encounter multiple errors and issues that need to be solved. One such issue that prevents Samsung Galaxy users from calling or texting someone is the “Phone not registered on Network” or “Samsung Galaxy Not Registered on Network

    Android is a widely used operating system in the world for smartphones. The operating system is already powering over a billion smartphones. Multiple manufacturers such as Samsung, Xiaomi, Huawei, Oppo, Vivo, and Oneplus, are using android as their primary operating system for their mobiles.

    Not Registered on a network is a common error for Samsung users and other android smartphone users. The error generally occurs when you are trying to call someone or text someone. There are multiple reasons for this error to occur. There might be a network issue or your cellphone is unable to establish a connection with your carrier provider, or any app is preventing you from calling or texting. Thankfully, there are many solutions to this issue and we are going to help you to fix the “Not Registered on network” error on your Samsung or any other android device.

    Why Does My Phone Say – Not Registered on Network

    The error “Not Registered on Network” generally indicates that your device is unable to connect to your carrier’s network. the error might also occur due to hardware failure or if you have not inserted your sim card properly. When such an error occurs, you will not be able to make any calls, and your incoming and outgoing services will not work, You will not be able to send or receive any text messages or use the internet. In such situations, you can generally try restarting your Samsung device and see if the issue is fixed otherwise read this article till the end to find the solution.

    What causes Not Registered on Network Error

    There is not fixed reason for this problem to occur and thus not a fixed solution too. However, we have tried to include all the possible issues and their fixes in this article and we hope that at the end of this article you will have a solution to your not registered on network issue.

    Below we are listing some of the common reasons for this error.

    • Your Phone is in airplane/aeroplane Mode.
    • You have inserted your Sim card incorrectly.
    • Your Operating system is outdated.
    • Your Carrier is having issues on their end.
    • You have rooted your device.
    • Your phone is not able to detect the correct carrier automatically.

    These are the common reasons for the not registered-on network error to occur. However, there can be other reasons and thus we are listing a few workarounds to solve this issue.

    How to Fix Not Registered on Network Error on Samsung/Android

    Now that we know some of the common reasons for this error to occur, Let’s see what are the ways to solve this problem and start receiving calls and messages on your Samsung or Android device.

    To quickly fix the Not registered on network error, Try shutting down your mobile phone and wait 30 sec – 1 minute before starting it again. This will reset any recent errors and glitches caused by system or third-party apps.

    Below are the ways to fix not registered on network error.

    #1 Put Your Phone on Airplane mode

    The very first step is to reset the network and make your smartphone establish a connection again with your carrier provider. to do that, You have to put your smartphone on airplane/aeroplane mode for 20-30 sec and then remove it from the mode.

    If you are not familiar with how to do it, Follow these steps

    Step 1: Scroll down your notification bar and look for the airplane-like icon.

    put phone on aeroplane mode

    Step 2: click the icon to turn it on.

    Step 3: Wait for 30 sec and again turn it off and see if the problem is solved.

    #2 Restart your Android Phone

    Another simple method to get your network connection back is to restart your smartphone. Press and hold your lock button for few seconds and you will see a menu asking you to “Restart” or “Power Off” your mobile. We recommend that you power off your phone and keep it like that for at least 30 sec to 1 minute before powering it on.

    #3 Check your Sim Card

    If you are experiencing this error just after you have inserted a sim card then you have to see if the sim card is inserted properly or not. Similarly, also check if the sim card is working fine and not damaged by inserting it into another device. Use the sim card ejector pin and pull your sim card tray and set the sim properly in the tray before putting it back in.

    #4 Update your Samsung/Android Device to the latest version

    It is always a good idea to keep your mobile phone updated to the latest available version. This ensures that all the bugs and glitches are fixed and also offers more device security. If there is a system update available then we recommend you to update your device. If you don’t know how to check for system updates then follow these steps.

    Step 1: Open the settings app on your mobile and scroll down to the “About Device” or “System Settings” option and click it.

    about device android

    Step 2: On the following screen either scroll down to the “System updates” option or look for the updates option based on your device.

    fix not registered on network issue

    Step 3: Finally, Click the Install now button and wait until the update is downloaded and installed on your device. This might take a few minutes to a couple of hours based on the size of the update. It is always a good idea to keep your device fully charged before proceeding with any update.

    install android updates

    Once your device is updated try inserting your sim card or try calling or texting someone to see if the “Device Not registered on network” issue is solved.

    #5 Manually Choose your Network

    If the given basic troubleshooting methods are not working for you then you can try choosing the network carrier manually using the settings app. By default, android chooses the network operator automatically but if it fails to do so then it’s worth trying it manually. Follow these steps to manually set the preferred network.

    1. Open the Settings app on your device and scroll down to the “Wifi & Network” or “Mobile network” option.

    2. Click the Sim and network option from the list or if you are able to see the sim card info directly then just click on it.

    3. Scroll down to the option that says “Network operator” or “Operator” and select it.

    4. On the following screen Disable the “Choose Automatically” toggle bar and Press “Yes” if any pop-up prompts.

    5. Wait till the phone searches for all the available network providers.

    6. Select your desired network provider and see if the issue is resolved.

    #6 Change your Network Type

    If you are traveling or visiting an area where network signals are weak or network types such as 5G and 4G doesn’t work then also you will receive the “Not registered on network” error. In such cases, you should be changing the preferred network type on your phone to something like 3G or 2G.

    Here are the steps to follow.

    1. Open the settings app on your device.

    2. Click on the “Wifi & Network” or “Mobile Network” option.

    mobile network android

    3. If you are using dual sim cards then select the sim for which you are facing the problem and scroll down to the “Preferred Network type” option.

    preferred network type android

    4. Here you can either select 3G/2G (auto) or 2G only. Try selecting any of the given options and restart your mobile.

    samsung device not registered on network error solved

    #7 Reset Network Settings

    You can also try resetting your network settings to default. This will undo any network changes done by you or any other third-party application. The Reset network settings option will not only reset your network settings but will also reset the Wifi and Bluetooth settings to their default settings.

    Step 1: Open the Settings app and scroll down to system settings.

    Step 2: Click on Backup and reset and then the Reset phone option.

    Step 3: Under the “Reset phone” option, select “Reset Network Settings” and wait until the process is done.

    #7 Contact your Carrier Provider

    If all of the above-provided methods fail and you are still experiencing the “not registered on network” error then try visiting the nearest network provider’s store and explain to them the issue you are facing. You can also call them from another number and ask for help.

    Conclusion:

    On day to day basis, most android users face errors and issues with their devices. These issues could be software or hardware related. One such issue is the “Not Registered on Network” error which is faced by Samsung Galaxy and other android phone users. The issue is not new and it can easily be solved by following one or few methods that are mentioned in the article.